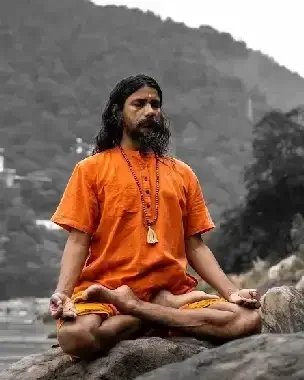
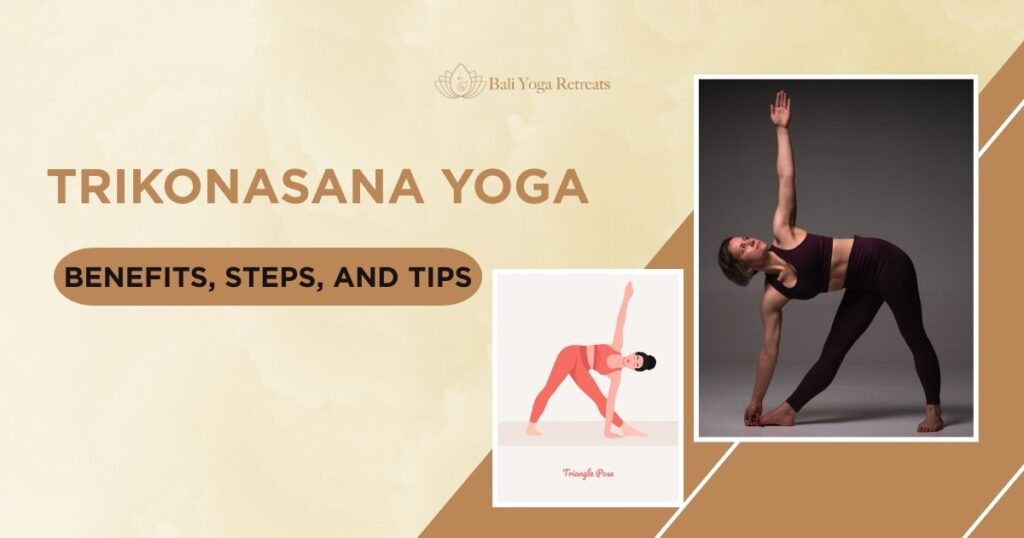
The Yoga Trikonasana Pose is a fundamental posture in yoga because it is used in almost every type of class, from alignment-focused sessions to fast-moving Vinyasa flows. If you see someone do this pose from far away, it might look like a simple stretch to the side. However, this first glance doesn’t show how deep the pose really is. The Yoga Trikonasana Pose is a challenging position that combines strength, flexibility, and stability. It teaches you how to use your body to create shapes by showing you how to maintain straight lines and perfect angles with your arms, legs, and spine. This is an excellent way to learn how to use your body to create geometric forms.
Students often have trouble with this pose at first because it requires the hamstrings and hips to be open at the same time. These are areas that can get tight when we sit in chairs for long periods. In the Yoga Trikonasana Pose, you learn to push down through your feet while stretching out through your arms and head. This pose makes you feel free and open in a way that few other postures can. It makes your legs feel heavy and stable, while your upper body feels light and open.
This guide is a complete manual for how to do Trikonasana. It will tell you exactly what to do, which parts of your body to focus on, what mistakes to avoid, and all the benefits of practicing it on a regular basis.
Yoga Trikonasana Pose is the Triangle Pose
“Trikonasana” is a Sanskrit word that means “three angles.” “Trikona” means “three angles” or “triangle,” and “Asana” means “pose” or “seat.” The name fits the pose perfectly because your body forms several triangles while you perform it. The floor and your legs make the main triangle that keeps you stable. The arm reaching down to your leg makes a second triangle, and the arm reaching up to the sky finishes the picture.
Three is an important number in yoga because it represents the balance between different forces, such as the union of mind, body, and spirit. It also shows how the past, present, and future are all linked, which makes us feel like our lives are moving in a steady direction.

Key Factors Of Trikonasana:
| Factor | Details |
| Pose Type | Standing Side Bend Yoga Pose |
| Level | Beginner To Intermediate |
| Main Focus Areas | Legs, Hips, Hamstrings, Spine, Chest, Shoulders |
| Main Purpose | Improve flexibility, balance, and posture |
| Key Physical Benefits | Morning or evening on a relatively empty stomach |
| Key Mental Benefits | Improves focus, calmness, and body awareness |
| Breathing Pattern | Inhale to lengthen spine, Exhale while bending sideways |
| Ideal Practice Time | Morning or evening on relatively empty stomach |
| Hold Duration | 20 To 40 Seconds Per Side |
| Repetitions | 2 To 3 Rounds On Each Side |
| Common Mistakes | Rounding back, locking knees, collapsing chest |
| Who Should Avoid | People with severe back injury, recent surgery, or severe vertigo |
| Follow Up Poses | Forward Fold, Mountain Pose, or Gentle Twist |
The Health Benefits of Trikonasana Pose
The Trikonasana Pose benefits extend beyond just stretching your muscles:
- Strength And Flexibility In The Body: It really works the hamstrings, hips, and groin, and it also makes the lower body stronger overall.
- Better Posture: Opens up the shoulders and chest, which helps fix the rounded posture that happens when you sit or use your phone.
- Strengthens Legs And Core: This exercise strengthens the muscles in your knees, ankles, legs, and sides of your waist. This helps you stay stable and balanced.
- Supports Spine Health: It helps your spine stay healthy by making it more flexible and easing the stiffness that comes from sitting or standing for a long time.
- Supports Digestion: A little pressure on the stomach can help with constipation and bloating and make digestion easier.
- Helps Reduce Stress and Anxiety: Breathing and balance exercises can help you feel less anxious and stressed by calming your mind and relaxing your nervous system.
- Supports Joint And Nerve Health: Keeps your nerves and joints in good shape. If it is lined up right, it might help with pain in the flat feet, mild neck pain, and sciatic pain.
- Supports Energy Flow: It wakes up the energy in the solar plexus, which is connected to confidence, and the energy in the heart center, which is connected to emotional balance. This makes it easier for energy to move around.

A Closer Look at Anatomy and Alignment
You need to know how your body works together to do the Yoga Pose Trikonasana safely. Getting the alignment right keeps you from getting hurt and lets you stretch deeper without having to push yourself.
- The Base: The pose starts with your feet apart, usually the length of one of your legs, which creates a steady pyramid shape. Your front foot turns 90 degrees to face the front of the mat, and your back foot turns 45 degrees to the side. The “heel-to-arch” method is the most common way to line up your feet. This means that the heel of your front foot should be in a straight line with the arch of your back foot. This position keeps you steady while letting your hips open properly. Some people may need to move their feet further apart to feel at ease.
- The Hips: Some students try to make their hips face the side wall completely, which makes it hard to figure out how to move them in this pose. In the yoga trikonasana pose, your pelvis is facing the side of the room instead of the front, and your hips are open. You want to stack your top hip over your bottom hip as much as possible, as if your body were stuck between two sheets of glass. If you stack your hips too much, your knee may hurt. To make it feel better, let your back hip roll forward slightly.
- The Back: The goal is to keep both sides of your upper body long so that your lower back doesn’t get compressed. A lot of people make the mistake of collapsing the bottom of their waist to get their hand closer to the ground. This hurts their back and makes it hard for them to breathe. You should focus on stretching your bottom ribs away from your hip to keep your spine straight. Imagine a straight line of energy running from your tailbone to the top of your head.
- The Shoulders: Your arms should be straight up and down from your bottom hand to your top hand. This will open up a lot of space across your chest. Place your top shoulder right on top of your bottom shoulder. This will fully open your chest and stop your upper body from falling forward. If you reach your top hand up strongly toward the ceiling, it will help lift the weight off your bottom hand so you don’t lean too much on your leg.
- The Knees: It is very important to keep a small bend in your front knee if your joints are loose. When you lock your knee, it pushes the joint back and pulls on the ligaments. This can cause injury over time. When you engage your thigh muscles, they lift your kneecap and protect the joint. This ensures that your muscles are doing the work instead of your bones.
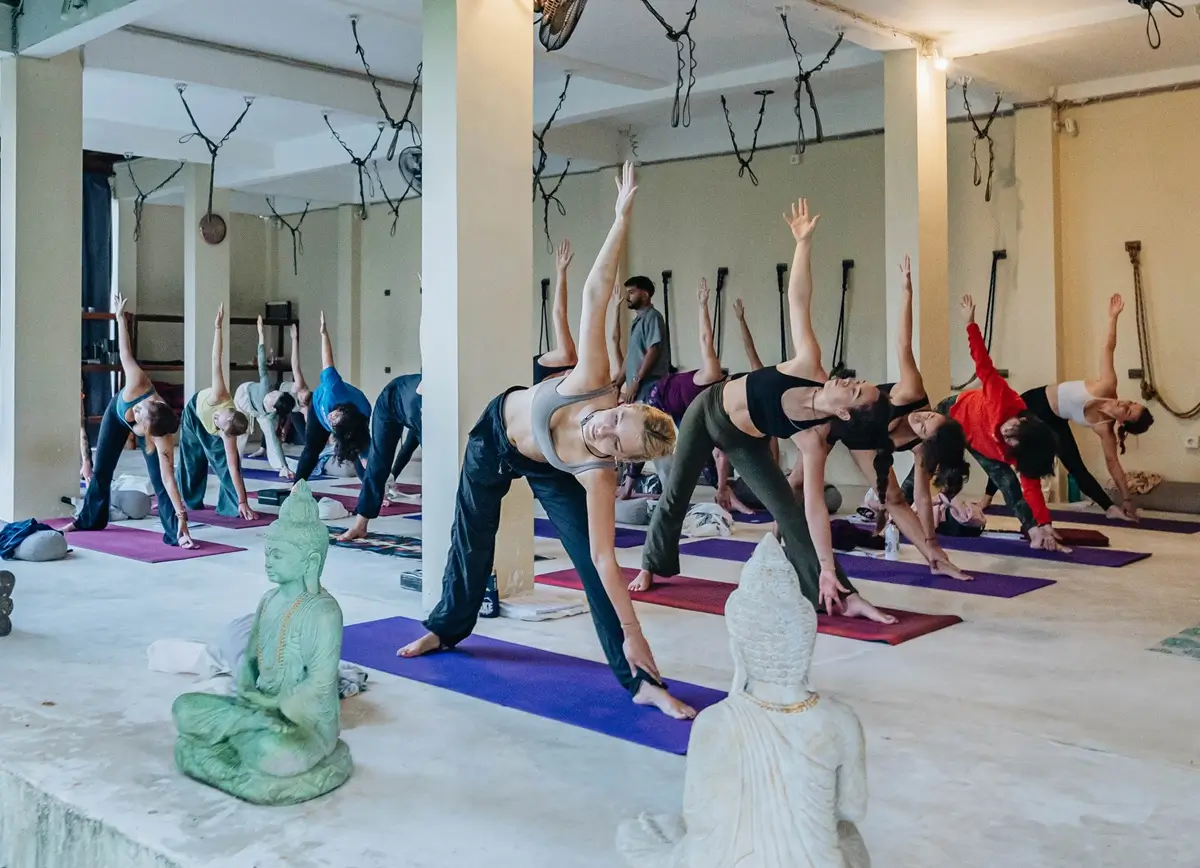
Steps by Step Guide for Trikonasana
We will now provide a clear list of the steps of Trikonasana so that you can practice with confidence.
1. The First Position
Mountain Pose. Stand tall with your feet together and your arms at your sides. Step or jump your feet about 3 to 4 feet apart. Stretch your arms out to the sides at shoulder height. Extend through your fingers to make your arms feel longer.
2. Setting Up the Feet
Turn your right foot out 90 degrees so that your toes point straight ahead. Turn your left foot in slightly at a 45-degree angle. Press down firmly on the outside edge of your back left foot to keep yourself steady while leaning. Line up your right heel with the arch of your left foot.
3. The Change
This is the most important step in the steps of trikonasana, but beginners often skip it because they try to tilt over too soon. Take a deep breath and engage your thigh muscles before you lean. Push your hips back toward your left heel and stretch your right hand as far forward as you can over your right leg as you breathe out. Imagine that someone is pulling your right hand forward to lengthen your spine.
4. Tilt
If you can’t go any further, spin your arms like a windmill. Place your right hand on your shin, ankle, or a yoga block that is outside of your right foot. At the same time, lift your left arm straight up toward the ceiling. Keep your arms in a straight vertical line and widen your collarbones.
5. Refine the Pose
Lightly press the back of your right hand against your inner calf. This will help your chest rotate up toward the sky. To keep your lower back from arching too much, tuck your tailbone slightly toward your back heel. Keep your head in line with your spine to keep your neck long and relaxed.
6. The Look
If your neck feels good, turn your head to look up at your left thumb to test your balance. Look straight ahead at the wall if this hurts your neck. You can also look down at your right foot. This is usually part of how to do Trikonasana for beginners or those with neck pain.
7. The Exit
To get out of the pose, press down firmly on your back foot to anchor yourself. To return to standing, take a deep breath and engage your core muscles. Lower your arms, turn your feet so they are parallel, and step back to the top of the mat. After that, repeat on the left side.
Common Mistakes and Safety Tips for Trikonasana
To keep your practice safe and effective, be sure to avoid these common errors:
- Collapsing the Chest: Many students care more about touching the floor than keeping their form, which makes their top shoulder roll forward. If you can’t keep your upper body flat, focus on keeping your chest open by putting your hand higher on your leg or using a block. It’s better to stay higher with good form than go lower with a collapsed chest.
- Hyperextending the Knee: Pushing your front knee back into a locked position puts your weight on the joint. A small, micro-bend in your knee engages your thigh muscles and stops your ligaments from getting overstretched. This also builds more strength in your legs.
- Shortening the Bottom Side: When you bend to the side from your waist, the muscles on your bottom side and your spine get compressed. To keep both sides of your waist long and even, stretch your bottom ribs forward. Instead of just bending your back, try to lengthen it.
- Neck Strain: Looking up by tightening your neck when your muscles are tight puts unnecessary stress on your body. Only look up if it feels comfortable. Look down immediately if you feel any pinching to release the tension.
Different Variations of the Trikonasana
There are many different Trikonasana variations that make the pose easier or harder, depending on your body’s needs.
- Using Props: Placing a yoga block under your bottom hand is the best way to improve this pose. This brings the floor closer to you and lets you open your chest without straining your back. You can put the block on the outside or inside of your foot.
- Wall Support: Practicing with your back against a wall provides immediate feedback. It tells you if your top shoulder is rolling forward or if your hips are sticking out. Try to keep your heels, hips, and shoulders against the wall.
- Bent Knee Variation: If your hamstrings are very tight or you have a knee injury, keep your front knee bent significantly. This makes the deep stretch less intense and takes the pressure off the joint while still opening the hips.
- Extended Triangle: This is the active version where your arms and legs are fully stretched out, and your muscles are working hard to expand in all directions.
- Revolved Triangle: This is a more difficult pose where your upper body turns toward your front leg. Your opposite hand goes to the floor, creating a deep twist in your spine. To do it correctly, you need a high level of balance and flexibility.

Conclusion
The Yoga Trikonasana Pose is a way to find balance and create space in your body. It teaches you to be open like the sky and grounded like the earth. It might be hard at first, but be patient with yourself. Flexibility comes from consistent practice, not force. Focus on getting the shape right first; the deep stretch will follow as your body opens up.
It’s difficult to get the alignment right on your own, so we suggest you learn more about these ancient methods. At Bali Yoga Retreats, our skilled teachers will review your form and help you find the modifications that are best for your body. Our 200 Hours Yoga Teacher Training Bali will teach you how the body works, how to stay safe, and the purpose behind each pose. Start your journey to feeling strong and open today.